1955 Spartan Travel Trailer
I began restoration of this 1955 Spartan Mansion serial #232 55 440 Trailer on Nov. 1, 2000. Any pictures, ideas, experiences or parts are welcome! E-Mail me jay@jayperkins.com
NOTE: The links in the text are sometimes links with much more detail on how each task was accomplished. Spartan sales brochure and an owner's manual are here. The owners manual is a PDF file about 3 megabytes in size, so it make take a few minutes to download if you are on a dial-up connection.
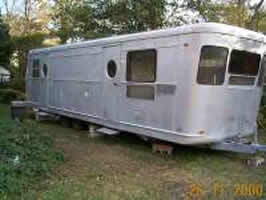
Here is the 32' Spartan Manor before the big move; had to sacrifice a few pine trees to get to it. (more pictures here )
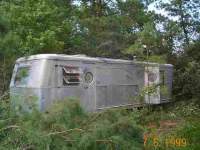
It has been sitting since 1981 or 1982.
Due to some other pressing projects, it wasn't until october 2000 that I was able to cut some trees to get to it and move it. To get it on the road we took it off the blocksand put some air in the tires. We moved it with a Ford Expedition and a weight equalizing hitch. My brother driving reported that is towed very easily, even though electric brakes were not connected.
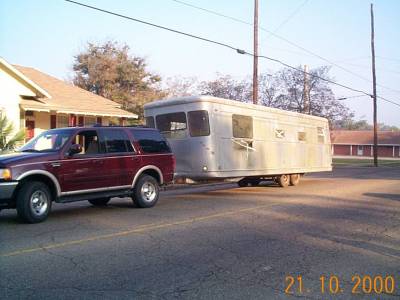
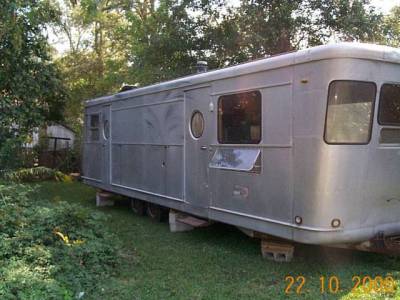
Here is her new temporary home next to my uncle's house. He is the original owner and his side yard made a good place to start work.
Renovation Diary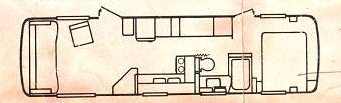
11-2-00
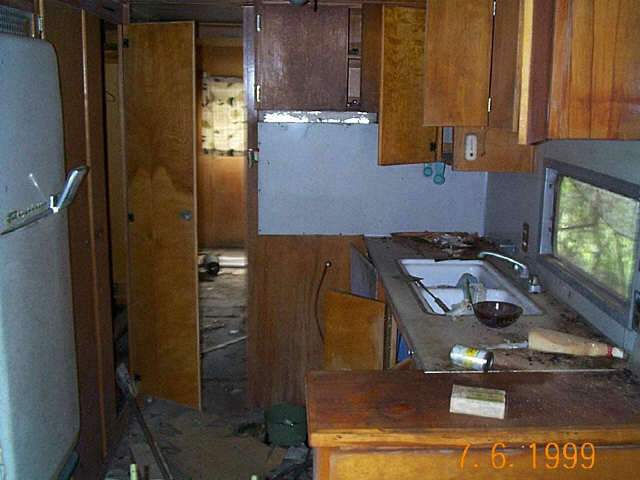
New pictures coming soon, glass will be replaced next week Yeah! Cost about $30 per window. Used Kool Seal and nylon mesh tape on some leaking seams; Also used some silver Butyl Rubber caulk wiped into the joints in the aluminum molding on the upper and lower sides. This stopped more leaks than the roof work! I am sure the vintage airstream people have a better caulking material to use.
11-10-00
The new glass is in! I have replaced most of the plumbing
which had frozen. I used copper tubing with screw type compression
nuts so it will be easier to replace sections in the future. Getting
behind the shower (the bath plumbing runs underneath and to the side of
the tub) was not too bad as soon as I realized it is easy to remove the
hall wall. I first had removed the bedroom sliding door track
and the track covering for both bathroom and bedroom. When removing the
wall or ceiling panels, use a flexible putty knife with one wrap of masking
tape on the blade to prevent scratching (Another nice tip from the Vintage
Vacations site) and pry the molding strips carefully loose and then remove
the screws along each edge of the panel. The panel may also
be tacked in the middle, just pull slowly on the end panels to loosen the
middle one. See the
plumbing page.
11-16-00
I have replaced most of the bad spots (front door and rear bedroom) in the floor with 3/4" plywood. It took 2 days as I had to carefully cut out the bad floor along the center of the 1x4" supports that are attached to the steel frame I then replaced the rotten 1x4's, attached them with 2" self tapping, self drilling screws Then packed the openings with some replacement insulation Only then did I cut the floor panels to size and anchor with screws. ( More floor repair information here )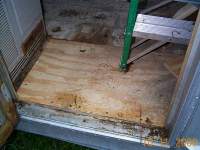
11-17-00
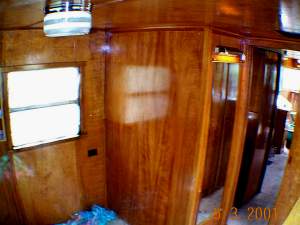
Acid washed on the right, not on the left It looks like a shadow, but it's not! From a great tip on the vintage-vacations.com site, I used " Etching MAG cleaner" from Eagle 1 It really does work, just spray it on wait a couple of minutes and hose it off. This does NOT polish it, just eats off the 40 years of junk and leaves a newly etched finish, a little whiteish looking. It will take away any shine or polish you used to have, just to be used in really bad cases I will get around to polishing it after the interior is done. UPDATE: Don't use etching- wash if you want to polish! It makes the polishing a lot more difficult due the roughing up of the surface due to the etching.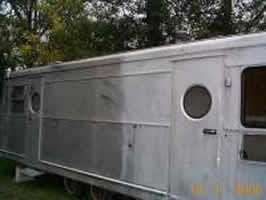
11-20-00
Still finishing the floor repair Also picked up some 1/4 birch plywood to start on some bad spots in ceiling above the front windows.
11-21-00
Started replacing the front ceiling with 1/4" birch plywood.
I also am replacing some insulation while I am up there Cleaned
out the Oil Furnace (Coleman Model 700), but haven't tried to light it
yet.
11-30-00
Removed the oil heater by removing the 6 screws into the wall and 2 screws into the floor This step that is required to get to the final 2 screws removed from side panel behind the heater, that hold the refridge in place. I had to rewire the furnace and ( not tough, I have a wiring diagram if you need it) replace the fan motor ( pretty standard motor, about $30.00) I pulled the lower pan by unscrewing a "propeller" type nut, and pulling it out after removing the oil line in back Either it all rusted away or there was nothing but a pan that fills with oil there in the first place I got the thing running on Kerosene and it really puts out the heat! I guess it it not missing any important parts. May reinstall it after the new flooring is installed.UPDATE: I lit the furnace outside of the trailer. It works well, but many people have emailed me about the dangers of the old furnance, so I am leaving it our of the trailer. It took up alot of space anyway.
12-01-00
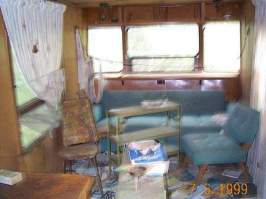
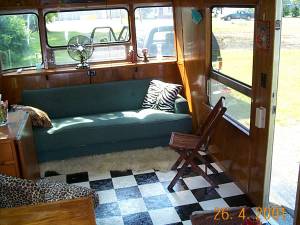
Some of the furniture is back from the upholsterer See it HERE .12-08-00
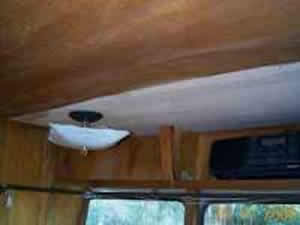
I pulled a ceiling panel and discovered a lot of rodent damage, looks like I will have to remove all the ceiling panels to clean it out. Should be easy EXCEPT for those over kitchen and bathroom.. darn.12-17-00
Details on the ceiling here .12-31-00
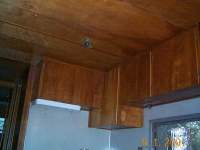
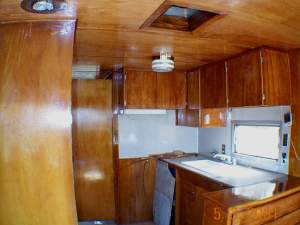
Sanded the Kitchen cabinets and put on the first coat of polyurethane, also sanded the molding removed during ceiling replacement.01-07-01
Matched the stain (see my stain matching page) Put the molding and re finished cabinets up with the help of a friend. Stained new ceiling which lead me to sand and re-stain the whole kitchen and living room area. Really starting to look better now!
01-09-01
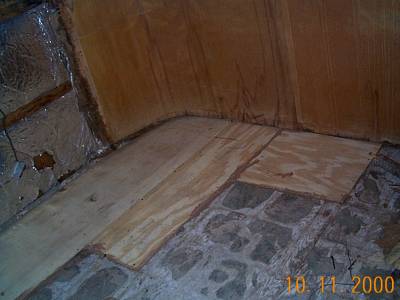
Decided to repair one more spot in the floor Wasn't really in bad shape just a little spongy I knew it would bug me later if I didn't do it before the new Linoleum was put down. Here is a before and after picture and details
02-23-01 to 03-09-01
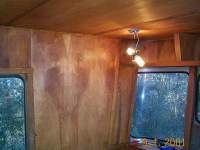
Changed my mind after some research I used alkyd spar varnish instead of Polyurethane and I like the results a whole lot better Note that Pentone (by Devoe Paint) is one of the few types I could find locally Martin Seynor makes a good spar varnish also. The last couple of weeks I have just been doing small stuff and varnishing all of the woodwork Linoleum Floor will be in soon I hope!!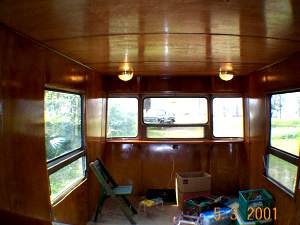
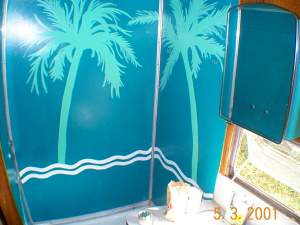

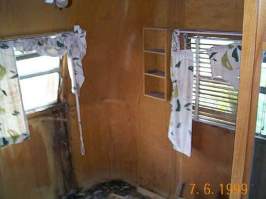
Bathroom shower art in progress by Celia.
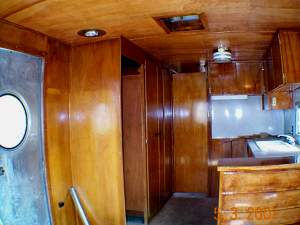
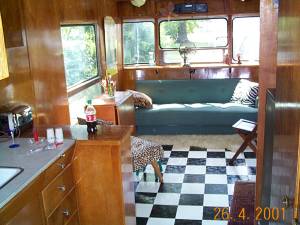
4/27/01
The floor is in and I have been doing a bunch of little stuff, putting
knobs back on etc. So.. I think this in the final set of interior pictures
Next, I will be polishing the exterior, refinishing the fold out table
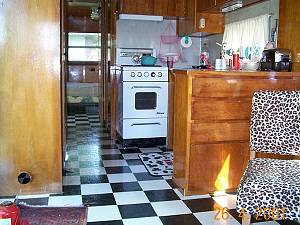
and reworking the forward screen door. Yes that is the original furniture
and Dixie stove.
 6/1/01
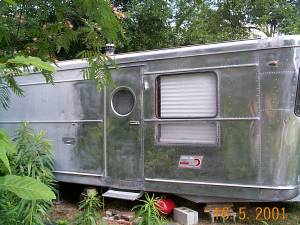
Some exterior shots while in the midst of polishing.. couldnt resist putting a "before" picture in.

May 22, 2001
I have started on the Aluminum polishing! After some research.. I have obtained the Dewalt 849 Sander/Polisher from http://www.harborfreight.com, they have the best price I could find I ordered the polishing pads from Lake Country in Wisconsin and Rolite polish, all 3 grades After finishing about 10% of the trailer I thought I would try some Nu-Vite polish as well I think I like it better! I will post some pictures and many more details on what works and doesn't work later this week.
July 31, 2001
Due to the south Mississipi summer. weather, I am holding off on finishing the polishing till fall . It is hard, hot work! Here is the latest picture of the exterior of the Spartan's new "country home". .